97-04 Corvette CJ2 ECC HVAC Repair

CJ2 Electronic Climate AC Controller
You can find parts to complete the repairs below Click Here
A free video of these repairs: Click Here
Tools Required
-
3/16" nut driver or socket
-
Xacto knife
-
Solder braid (fine size, like 1.0mm - 2.0mm)
-
Soldering iron (15-40W)
-
Tweezers
-
Marker / Sharpie
-
Wire cutters
-
(Optional) A Digital Multimeter to measure surface-mount resistors
-
(Optional) 91% Isopropyl Alcohol and old brush to remove resin from soldering process


Disassemble the CJ2 Head Unit
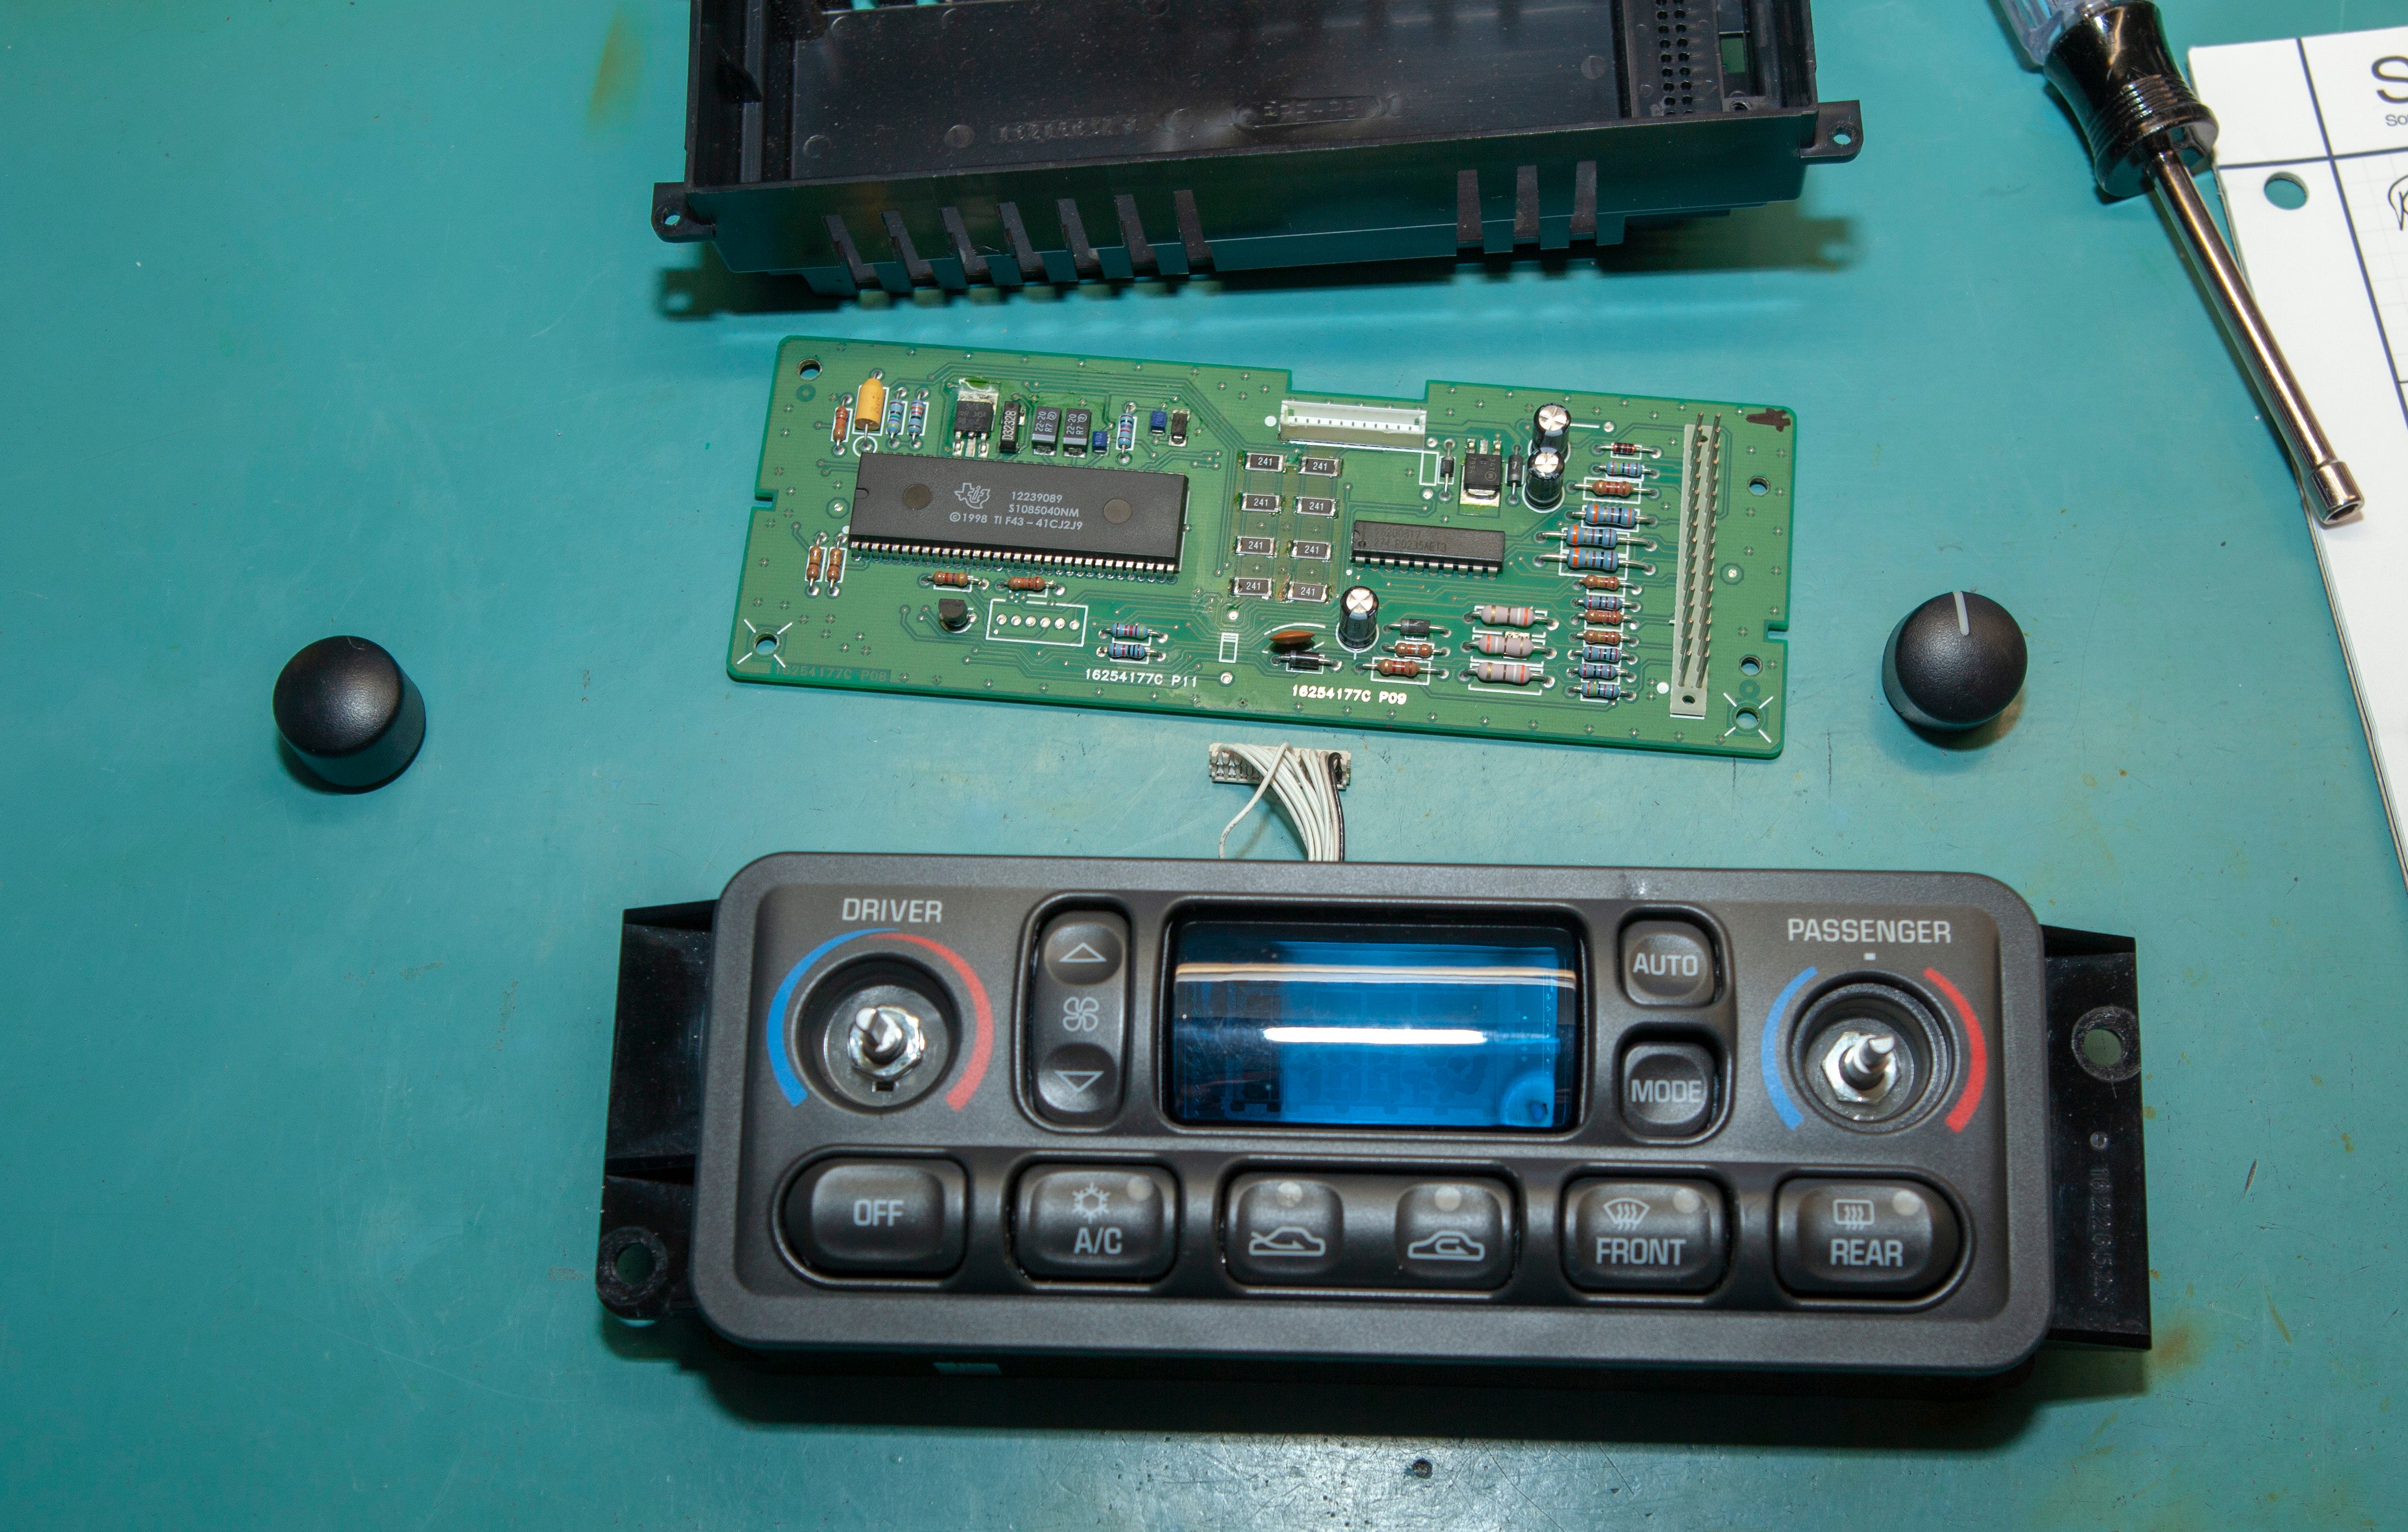
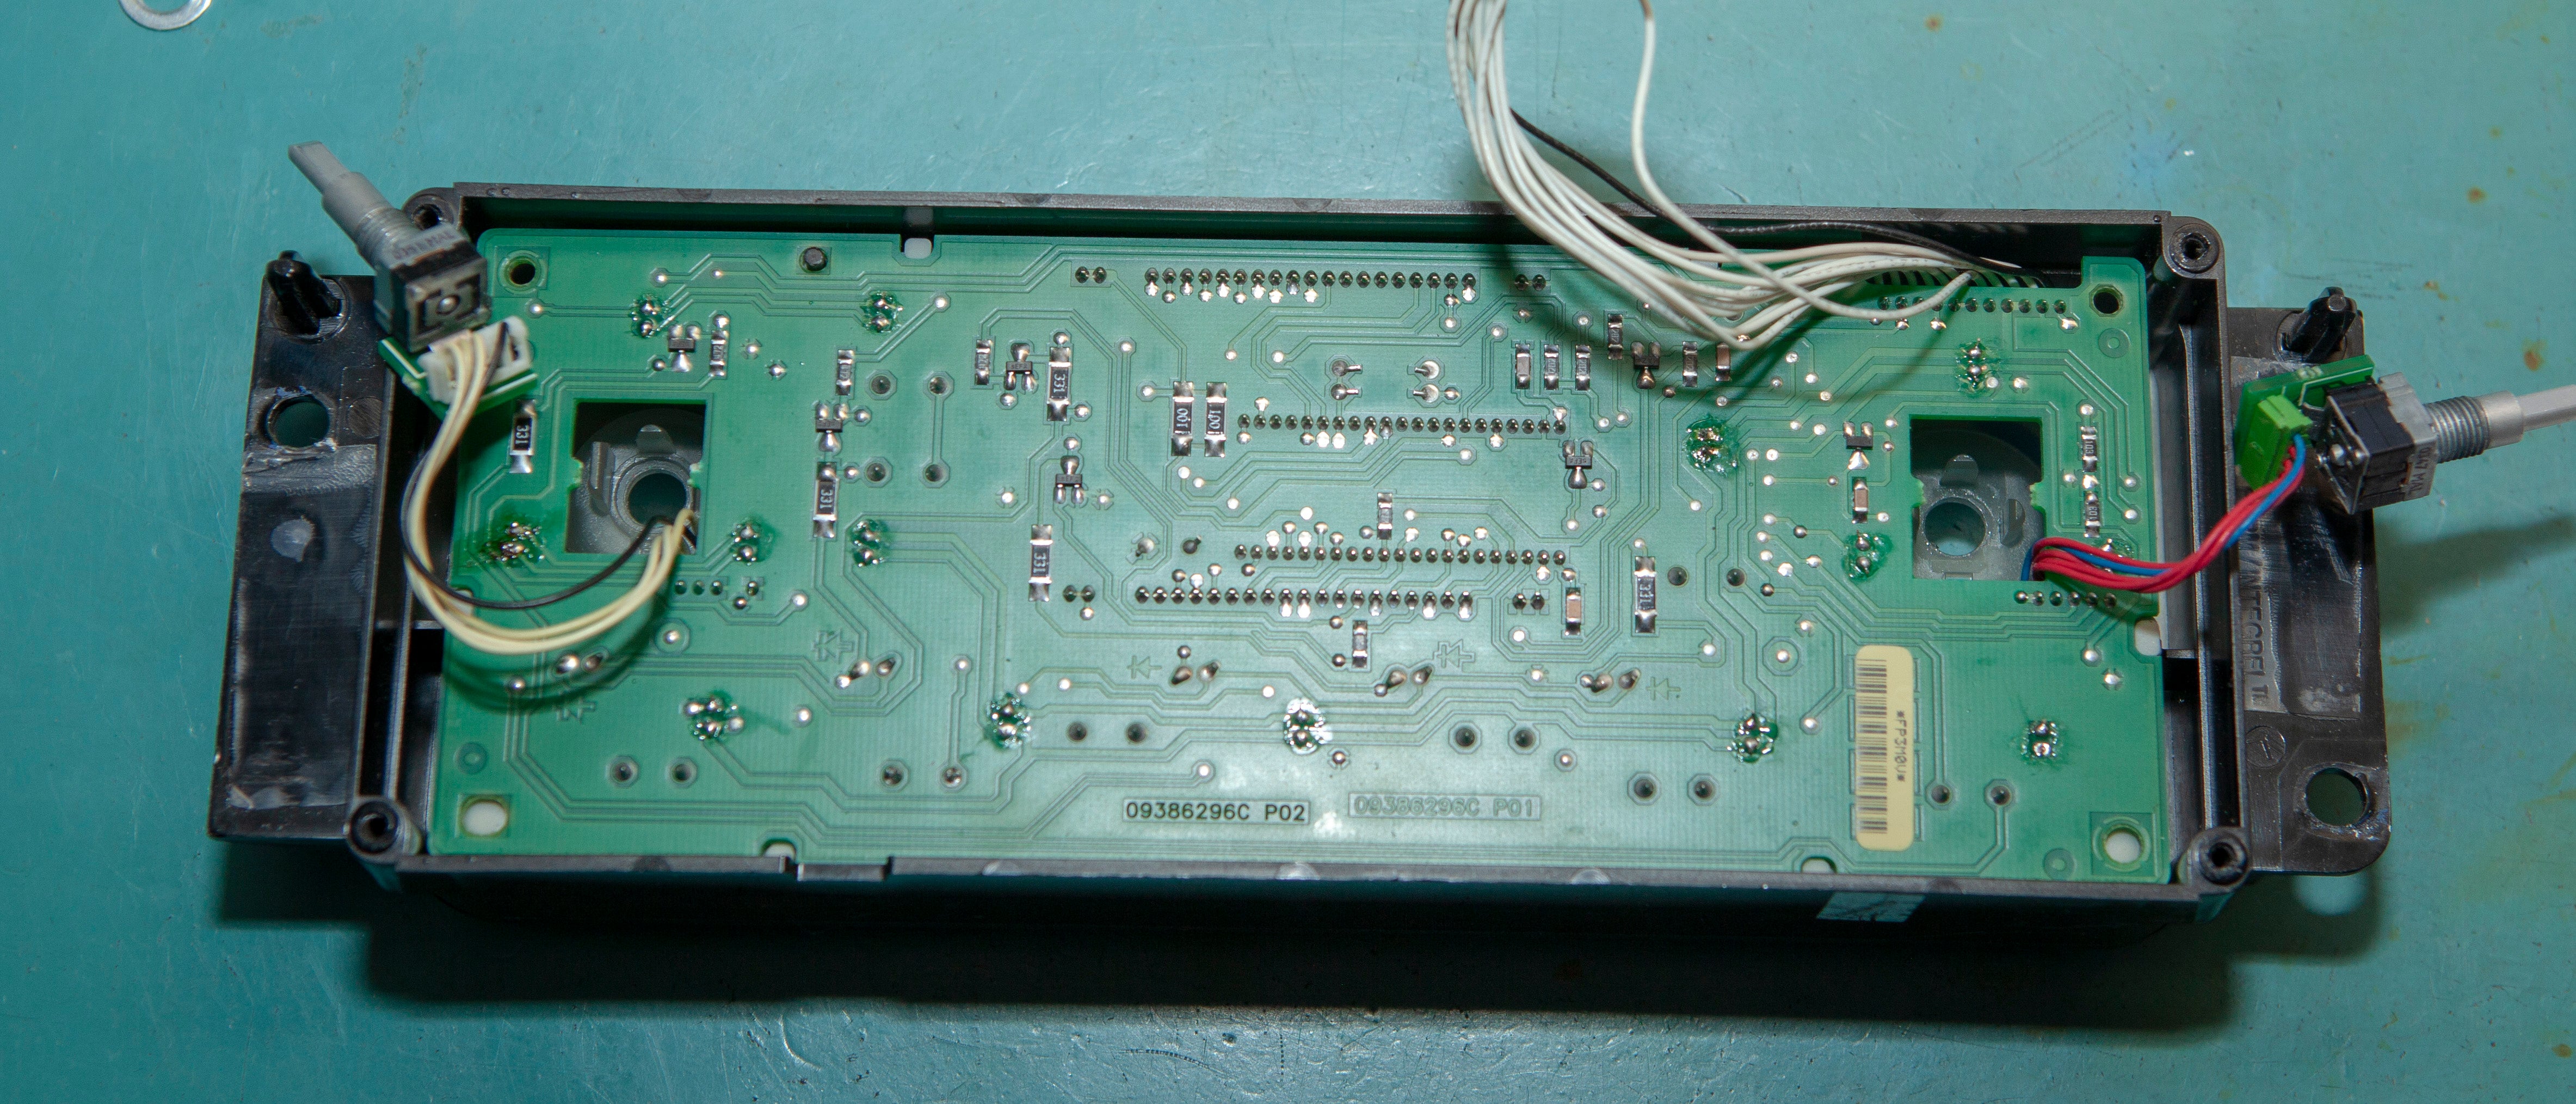
1) Remove the four 3/16" screws from the back of the controller and tip the back plate with circuit board over carefully.

2) Remove the four 3/16" screws from the inside of the back cover and lift the circuit board out.

3) Turn the circuit board over and disconnect the connector which connects the two boards.

4) Pull the two knobs off of the face of the controller.

5) Using a 7/16" deep socket or needlenose pliers, remove the nuts on the metal shafts under the two knobs removed in the last step. Remove the washers and set aside.

6) Gently lift the circuit board from the front plastic housing. Set the white button mat aside, along with the blue lens.

Rebuild the Display Board


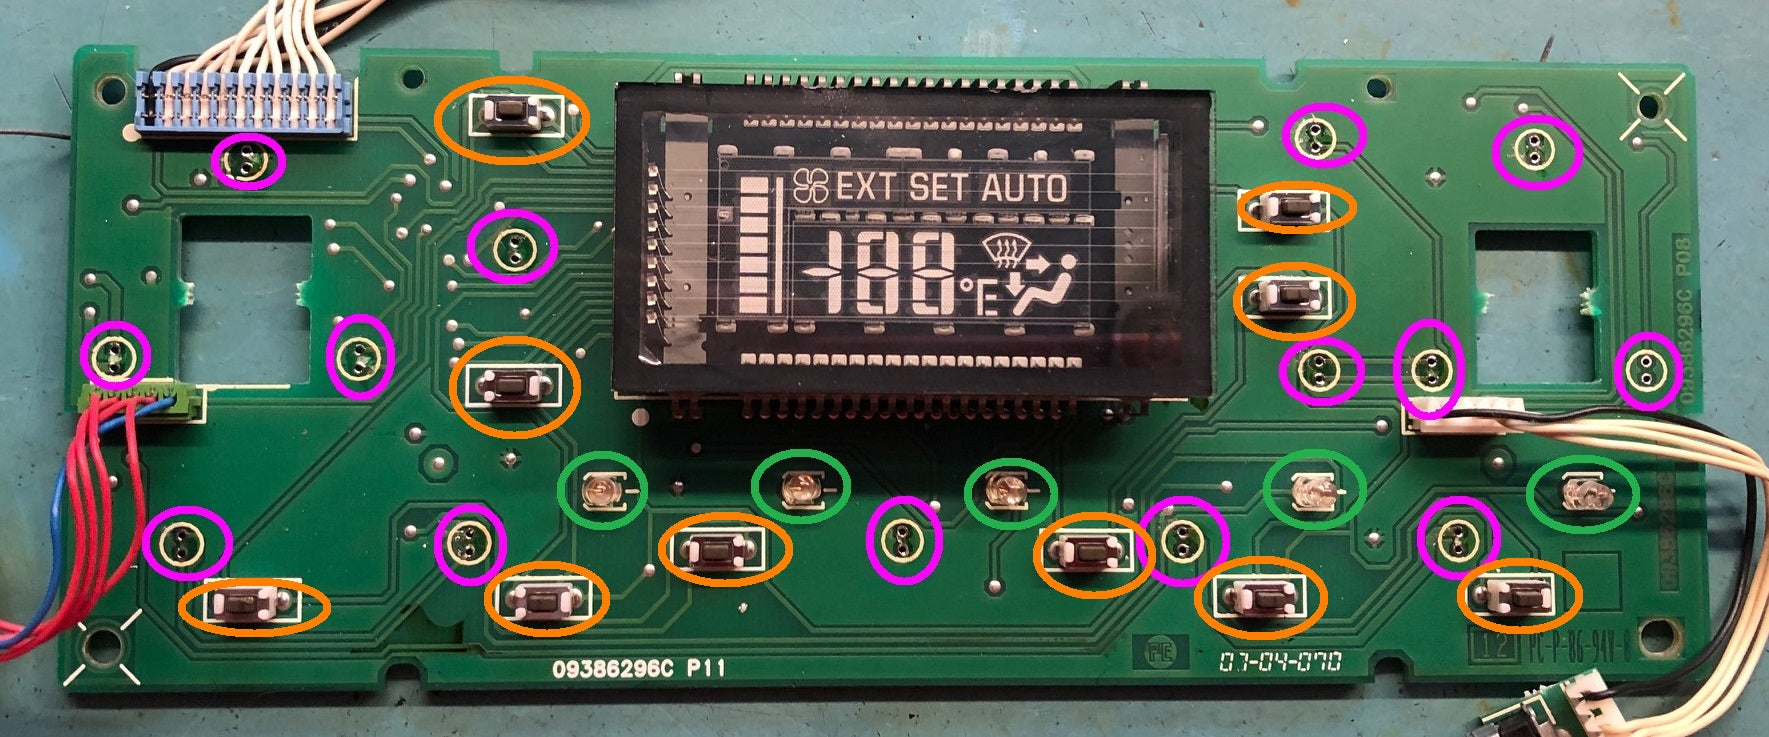
7) There are 14 incandescent bulbs which illuminate the controller buttons. These 14 bulbs are circled in PINK in the image at the top of this section, and should all be replaced, as they wear out quickly. Note that there are five smaller LEDs which look similar to the bulbs. These are circled in green in the image at the top of this section, and should not be removed!
8) To replace the bulbs, apply heat to the two terminals simultaneously and gently pull the bulb away from the circuit board.

9) If the holes are soldered shut, use solder braid or a solder vacuum to remove the old solder.

10) Install the new bulb and solder it in place, then clip the leads short to prevent them touching and shorting.

11) Repeat steps 8-10 for each of the other 13 bulbs.
12) There are ten switches on the display board. These are circled in ORANGE in the image at the top of this section. These typically don't need to be changed during a normal maintenance, but excess wear, liquid spills and user abuse can cause them to fail. If you have a non-working button, go ahead and replace the switches.
13) Apply heat to one leg of each switch, and use the Xacto knife to lever that end of the part out of the hole. Repeat for the other side of the switch and set it aside.
14) If the switch holes are soldered shut, use solder braid or a solder vacuum to remove the old solder.
15) Install the ten new switches provided with the kit. Solder each leg to the board using the provided solder.
16) Repeat step 13-14 for each of the remaining 9 switches.
Note: The resin left behind on the board really won't hurt anything, but if you want to remove it, use 91% rubbing alcohol and an old toothbrush and wash away the resin.
Rebuild the Top Wiring Harness Board

Old Style Top Wiring Harness Board

17) The top wiring harness board houses the power supply for the HVAC controller, as well as the power resistors which control display brightness. There are two styles of top wiring harness boards which are shown in the two images above. Use the image that looks like your board, and ignore the other image.
18) Using the solder braid, remove the solder holding each end of each of the eight flat resistors circled in RED in the two images at the top of this section.
19) Gently heat one end of the resistor while lifting away from the board using the Xacto knife. Be exceptionally careful here - the pads on the board can lift if you're not careful!
20) Heat the other end and remove the resistor from the board
21) Put a dab of fresh solder on one pad of the board.
22) Holding the new resistor with the tweezers, melt the solder on the board. Press the new resistor while heating to make sure it's flat to the board.
23) Solder the other side of the new resistor.
24) Repeat steps 20-23 for the other seven display resistors.
25) When all the new resistors are in place, the eight resistors will be in parallel. If you have a multimeter, measure the resistance across any resistance. It should read 30 Ohms. If not, one or more resistor may not be soldered correctly.
26) The capacitors are circled in YELLOW and BLUE in the two images at the top of this section. Before removing the capacitors, mark a "-" on the negative terminal of each of the three capacitors. These are indicated by the large stripe arrow printed "-".
27) Apply heat to both terminals of the capacitor simultaneously, and gently pull the old cap away from the board. Repeat step 26 for the remaining capacitors.
28) Remove any solder from the capacitor holes.
29) Install the capacitors supplied in the kit. The capacitors circled in yellow are 100uF in size. The newer style board uses two of these, and the older style board uses three of these. The capacitor circled in blue are 10uF in size. The newer style uses one of these, and the older style board doesn't use any of these. Make sure to install them following the polarity markings you made at the start of this step.
30) Solder each leg of each capacitor, then trim the excess leads close to the board so they can't short out.
Reassemble the Controller
31) If needed, clean faceplate and buttons and button mat with warm water and Dawn dish soap. Completely dry before reassembling.

32) Replace the display lens.

33) Replace the white rubber button mat as shown above.

34) Replace the display circuit board as shown above. Replace the metal shafts of the temp control as shown.

35) Replace the washers and nuts using needlenose pliers.

36) Reinstall the knobs as shown

37) Reconnect the second circuit board.

38) Reinstall the four screws that hold the second circuit board to the back plastic cover.
39) Reinstall the four screws that hold the back plastic cover on the controller.

40) Please make sure to temporarily connect the controller and test thoroughly before reinstalling and reassembling the car!
This completes the 97-04 HVAC Controller Rebuild Process.
